Download Pack
This pack contains 1,963 VJ loops (12 GB)
https://www.patreon.com/posts/123392611
Behind the Scenes
Morphing machines are a perfect metaphor for the wild changes we’re living through. Palpa and I have been wanting to collaborate on a VJ pack for a while and so we started off by discussing some possible themes. We were both excited to explore an abstract mecha theme and see what new directions it took us in. We each have distinct skill sets in using different AI tools, which was particularly interesting for us to leverage. Def go subscribe to Palpa for some mind bending visuals!
A technique that I’ve been hungry to explore was doing vid2vid using AnimateDiff. Palpa has a solid understanding of the best approach and pitfalls to avoid in ComfyUI. So I started off by going through my VJ pack archives and curating some videos that could serve as motion references for the vid2vid processing. Palpa made image references using MidJourney that was used as an IPadapter to drive the overall look of the video. By combining a text prompt, image references, and motion references into AnimateDiff, Palpa was able to generate some really stunning visuals. I’ve been dreaming of visuals like this for years! The raw visuals from AnimateDiff were 512x336 at 12fps, then ran the high-rez fix workflow to reach 768x504, and then Palpa used an LCM technique in ComfyUI to refine the animation and uprez to 1280x720. Then he used Topaz Video AI to further uprez and interpolate to 60fps. Wild all the layers of interpolation and extrapolation here to uncover and paint in as much detail and nuance as possible! I think it’s a fascinating pipeline that he’s engineered and is ripe for happy accidents.
Midway through our collab, I got inspired by the videos that we were making and realized that I had enough time to train a StyleGAN2 model. Since time was tight, I decided to rely on Stable Diffusion to generate the abstract mecha dataset, that is instead of Flux which has a higher degree of variability and better quality but renders much slower. So I found a mecha SD model on Civit and tried to create a text prompt that would generate the images that I had in mind. But it seemed like the SD model was overfit and so it would frequently output images with the same poses. So I slept on it and woke up realizing that I could instead do img2img, set the denoising strength to 40%, and use my 512x512 Wildstyle Graffiti dataset as the driver as a way to push the SD model in the direction that I desired. In doing this I finally overcame a long-term issue with img2img batch renders being forced to use a single seed value, which is default to both Forge and Automatic1111. This can be a problem since the generated imagery could repeat itself due to the seed noise remaining static for the entire batch render, particularly if the input image is too similar to another input image in the batch. So I scoured Github and found a solution via the run N times script for Forge. From there I was able to start up two instances of Forge so that I could use both of my GPUs and do an overnight render of 41,742 images (512x512). I then used these images as a dataset to fine-tune the Wildstyle Graffiti StyleGAN2 model. I normally use the FFHQ SG2 model as a starting point, but my prior Wildstyle Graffiti Sg2 model already had similar abstract forms and so I theorized it would therefore save me a bit of training time. I trained this model for 2208 kimg, which translates to 26 hours on my x2 GPUs. At some point there was a power outage and so the training process was halted. So I rendered out a test video and thought it could maybe be trained some more. But after rendering out 30,000 seeds and doing some manual seed curation, I realized that the SD dataset had some overfit patterns that were hard for me to see initially. It’s always amazing to me what patterns a computer can and cannot pick up on. But the SG2 model was luckily at the sweet spot and so I didn’t do any further training. From there I curated the best seeds and rendered out videos from SG2. I also did some experiments in rendering out the SG2 videos with a truncation value of 2.0, which were intensely distorted in an amazing way.
When I shared the StyleGAN2 videos with Palpa, he had an idea to throw a video directly into the LCM processing to see how it refined the video directly. He was particularly interested in the truncation 2.0 videos due to their fast movements and bright colors, which surprised me since I assumed they’d be too extreme. The end result after the LCM processing is amazing to me since it follows motions precisely and yet the overall style is transformed into mecha cubism. From there I was curious to see what happened if I composited together the SG2 and LCM videos and see how the textures/forms interplay, and sure enough it feels as though the paint is mutating on the mecha forms. Very interesting to combine together the results of two very different AI tools. Palpa also rendered some wild videos using the full AnimateDiff pipeline and the SG2 videos as motion references.
Since I was receiving the AnimateDiff renders from Palpa continually each day, I started compositing in After Effects much earlier in the creative process than I usually do. Jamming in AE is one of my favorite things to do since there are so many techniques to explore and I can follow my intuition based on how the content inspired me. Well this content was rich with possibilities and so I created loads of variations. Due to the AnimateDiff technique, there was some heavy noise that was flickering in the black backgrounds and so I did some advanced color correction. First I used a Curves FX to selectively remove the flicker. Then as a way to regain some of the dark gradients, I used a Linear Color Key FX to select the noisy areas and then used it as an alpha map to selectively apply a very subtle glow as a hacky way to generate some fake gradients. But I also did all kinds of FX experiments in AE such as playing with HexTile, Modulation, Deep Glow, Pixel Sorter, and Pixel Encoder. Some of these FX can easily dominate the content and so I used the Composite Brush FX to key out specific colors, then invert the mask and use it to apply the Modulation and Pixel Encoder FX to only select parts of the footage. This is a favorite technique of mine due to its serendipity and relative ease. I did some experiments in making my own echo effect by making a fake luma matte from the bright spots in the video, applied the levels FX so as to made the denser gradients in the alpha channel, linked the luma matte to the original video, pre-comped it, x3 duplicated it, offset the time for each of the duplicated comps, and then applied Tint FX so that each echo was darker than the preceding one. This technique differs from the Echo FX in that I can precisely control the luma matte and also the darkness of each layer.
While comping these scenes together I got curious to do an experimental technique in taking footage and making it into hacky 3D forms. So I selected a few AnimateDiff videos and prepared them to be fake animated displacement maps by importing them into AE and setting up multiple layers with gaussian blur that used a multiply blend mode so as to soften any edges in the footage. Then I rendered out the raw color to a JPEG sequence and the displacement map to a TIFF sequence since any compression artifacts would be visible in the 3D displacement renders. Then brought these into Maya and set up a camera to perfectly match up with a polyPlane (16:9 ratio) and apply both animated textures to the polyPlane. Set up an IBL light for realistic lighting and fast rendering. I then created another polyPlane to be slightly higher than the other polyPlane and applied to it a holdout shader (aka black hole shader) so that any of the 3D displacement that is below this polyPlane would be completely hidden. Kinda like a boolean done at render time. And so by changing the height of this polyPlane, I can do some test renders and determine how the displacement to be cut out. From there I rendered it out from Maya, imported the renders back into AE, and layered it back on top of the original AnimateDiff videos. It's a bizarre technique I cooked up a while back.
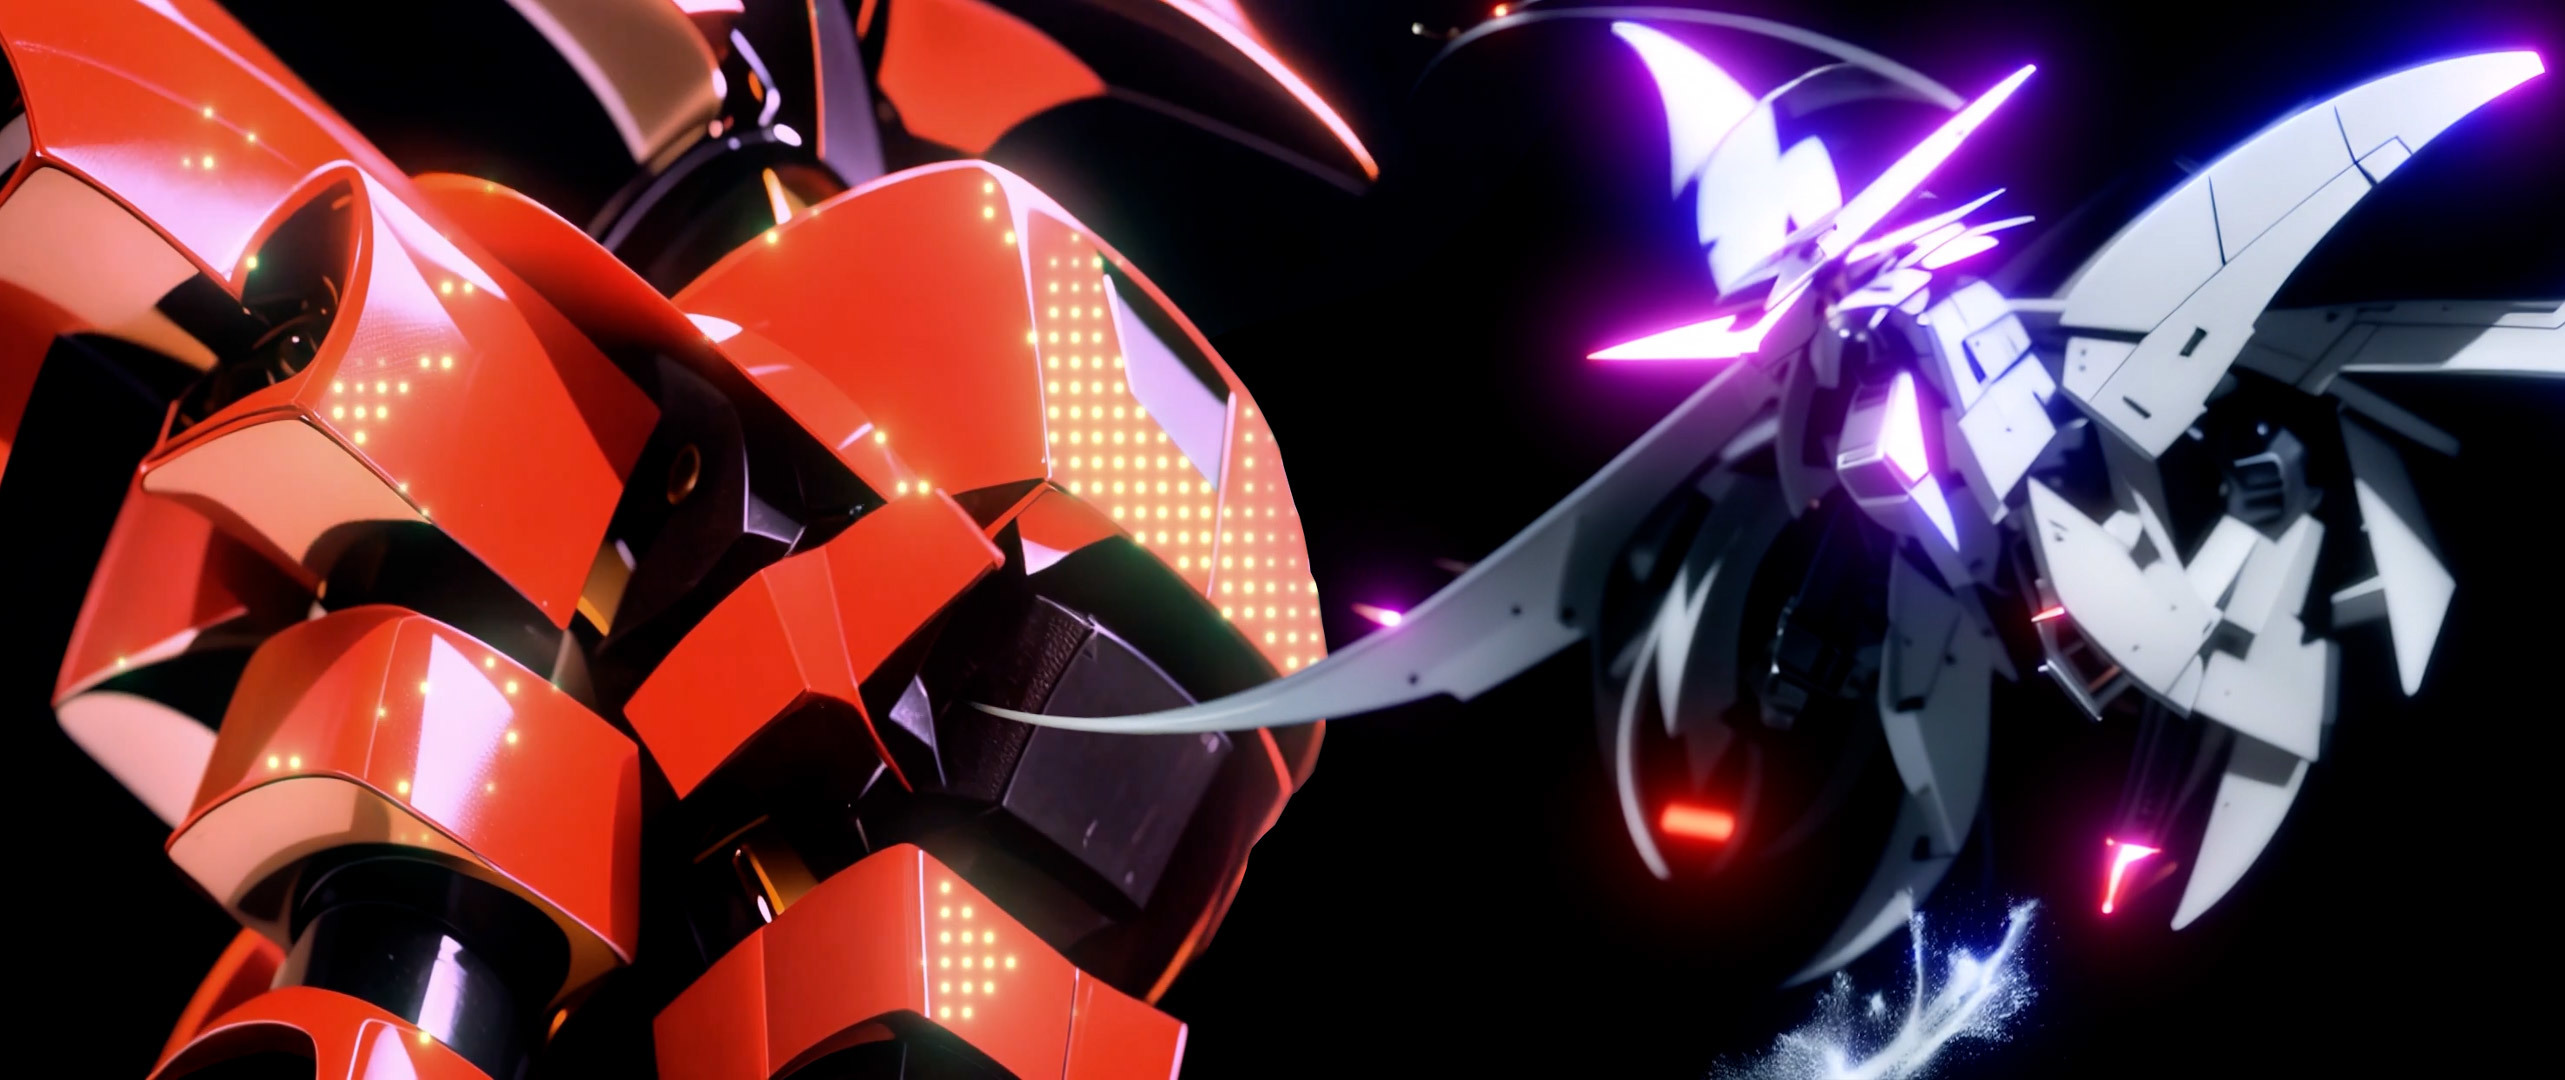
A while back I stumbled across this amazing parallel transport technique by Cullen Hassel. I've been curious to try reverse engineering the technique and it took some experimenting in Maya to figure out. First I tried duplicating the model/keyframes and then staggering the keyframes, which indeed worked nicely and yet it was very cumbersome to setup. From there I realized that I could use the MASH procedural effects built into Maya by combining the Distribute node and Time node to achieve the same look but give me freedom to more easily experiment with different ideas. Once I had a MASH template then I could just drop the model into the Repro node and it'd be ready to go. Overall it's not quite the same technique but I'm happy with the result. Also to make the animations feel less static, I slowly rotated the camera around the central axis and added a single area light to create some dramatic shadows. From there I was ready to play and so I curated a bunch of Gundam Wing models and effectively went to the trash yard looking for scrap parts. I only wanted strangely shaped pieces of machines that felt highly engineered. And then of course the parallel transport technique gives it a sense that it's definitely not of mother nature.
This was a very satisfying collab with Palpa and we covered some new ground by combining our techniques in unique ways. Mighty morphin mecha madness!

Discussion (0)