Masking is one of the pillars to computer arts that we take for granted and is rarely explained. I remember being a college student and learning the power of a layer mask in photoshop. That moment I realized how much time I could save myself by using these techniques. I think this an important concept to understand however, it has taken me a while to master. There are many great applications that utilize masks however not much is explained beyond the typical, " white" means you can see the image Vs "black" you cannot see the image. That is referred to as an alpha channel mask. Typically this is that basic mask however some programs allow you to use many different channels as masks or some such as photoshop, Black Ink and Resolume allow you to use a luminance as a mask. Today I would like to take some time explaining some of these concepts. I will be using a program called "Black Ink" however these concepts are universal.
Masking is a process that was created mainly for the publishing industry. When newspapers wanted to get shades of grey in a photo for the newspaper they would use a process called halftone to make the variations of grey in the photo. Sometimes they would want to add emphasis on an area to separate the background from the foreground. They would use a ruby Lith, a plastic red and clear layered cellophane to cut out the background from the foreground. This is why in Photoshop the Quickmask mode is red it is a reference to that process. Desktop publishing, Video Broadcasting and Screen printing have all adopted similar processes to this as well to make what we know as masking in the 21st century.
A Basic Gradient Mask
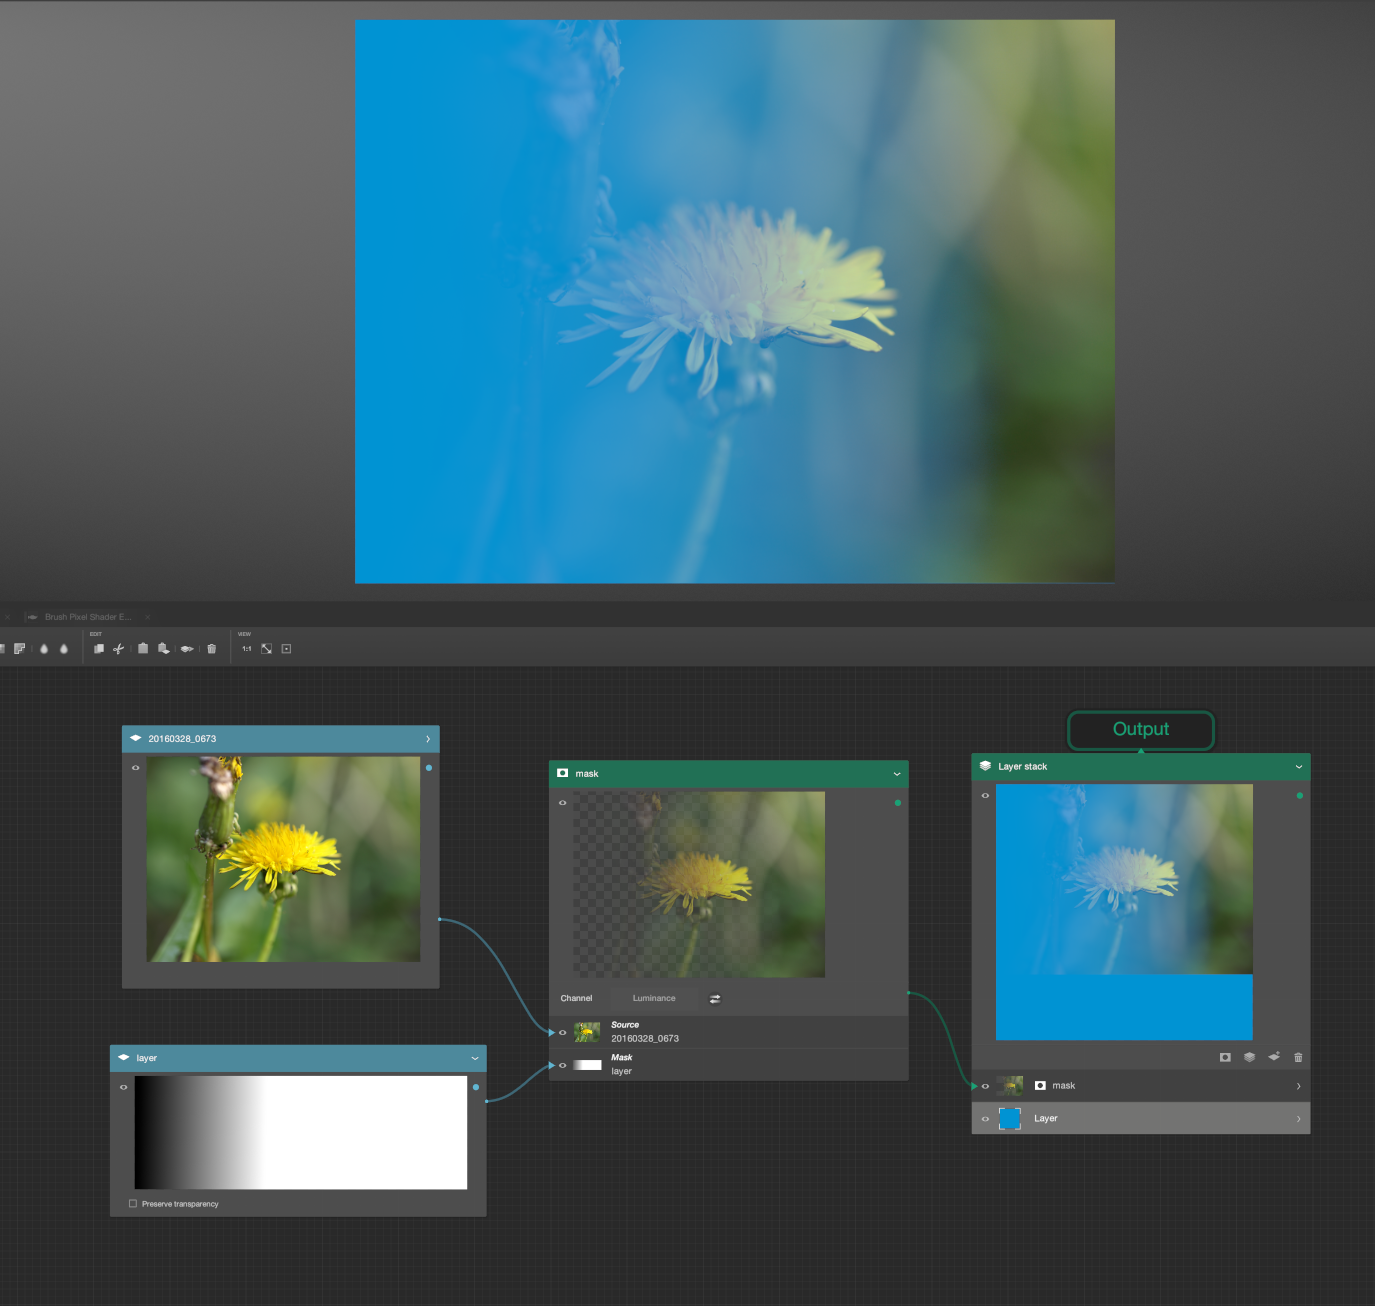
Here is a simple node system of a mask. I tried to break it out into its simplest form. The top left node is a layer from image node of a daisy photo I took. Below that is a layer with a simple gradient from left to right, Black to white. Both layers are connected to the Mask Node in the middle right. To the right of that there is the output. Notice that the black areas on the left of the image are blue and the right of the output are filled with the flowered image. I see here that there is a flat blue stripe at the bottom please know that is because the gradient only covers the picture and the picture in not the same size as the blue background however, The black and white gradient is a transition from left to right of the 256(0-255) shades of the greyscale that is being used as a way to gradually step up the levels of transparency in the image.
A little bit about the Nodes
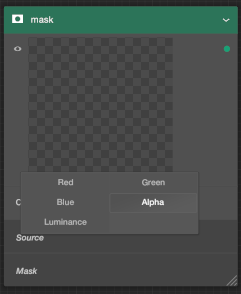
In Black ink, this is the mask node by itself:
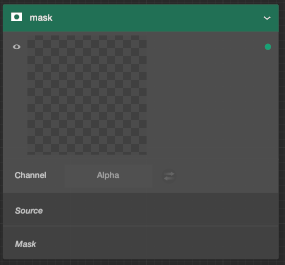
Note that the node is looking for channel type on the top left side and one output on the right. This allows us to use different types of masking. These channel options are the different types of masking available in this program. In this article we will now examine each node to see it's affects in the development process.
Alpha Masks
An alpha mask is probably the easiest to understand so let's start there. In this context the alpha mask pertains to the overall shape of a layer. In this example the left top layer is just a textured blue and white fill across the entire canvas. Below that layer I have a red and black gradient circle. In this particular case the color does not matter only the shape of the red circle created. When each of these layer nodes are fed into the input the mask and the channel option has been set to "Alpha" the output is a masked shape in the style of the first layer. I used a red and black gradient circle to convey a point when making an alpha mask. As stated before the color is stripped away from the mask and converted to a 0 or 1 Alpha channel. Some programs such as photoshop will automatically convert the mask to black and when applied. An Alpha Chanel is the absence of color or the transparency of a color A value of 0 or 1 values of transparency. This means that the circle is treated as either black or white.
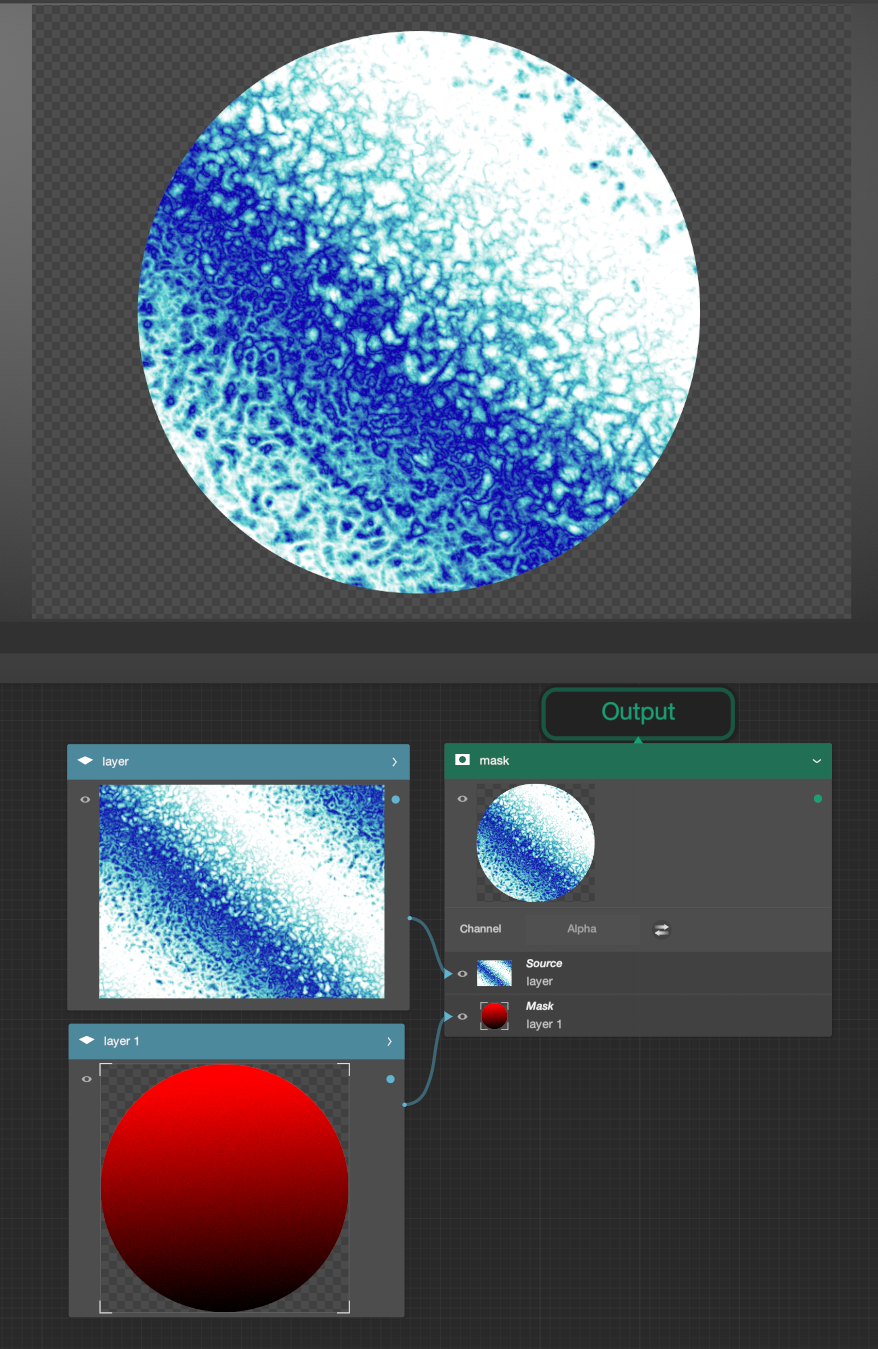
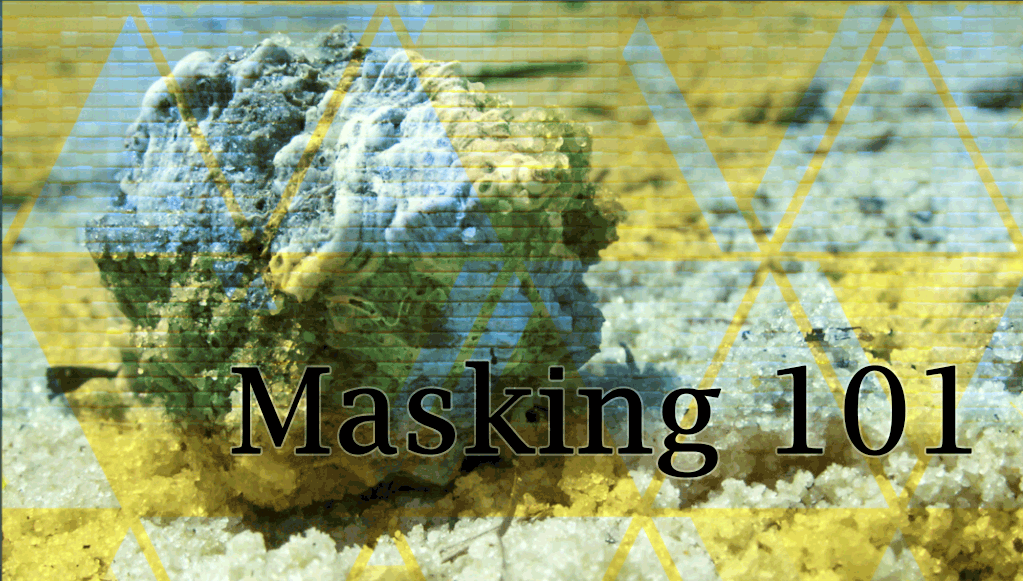
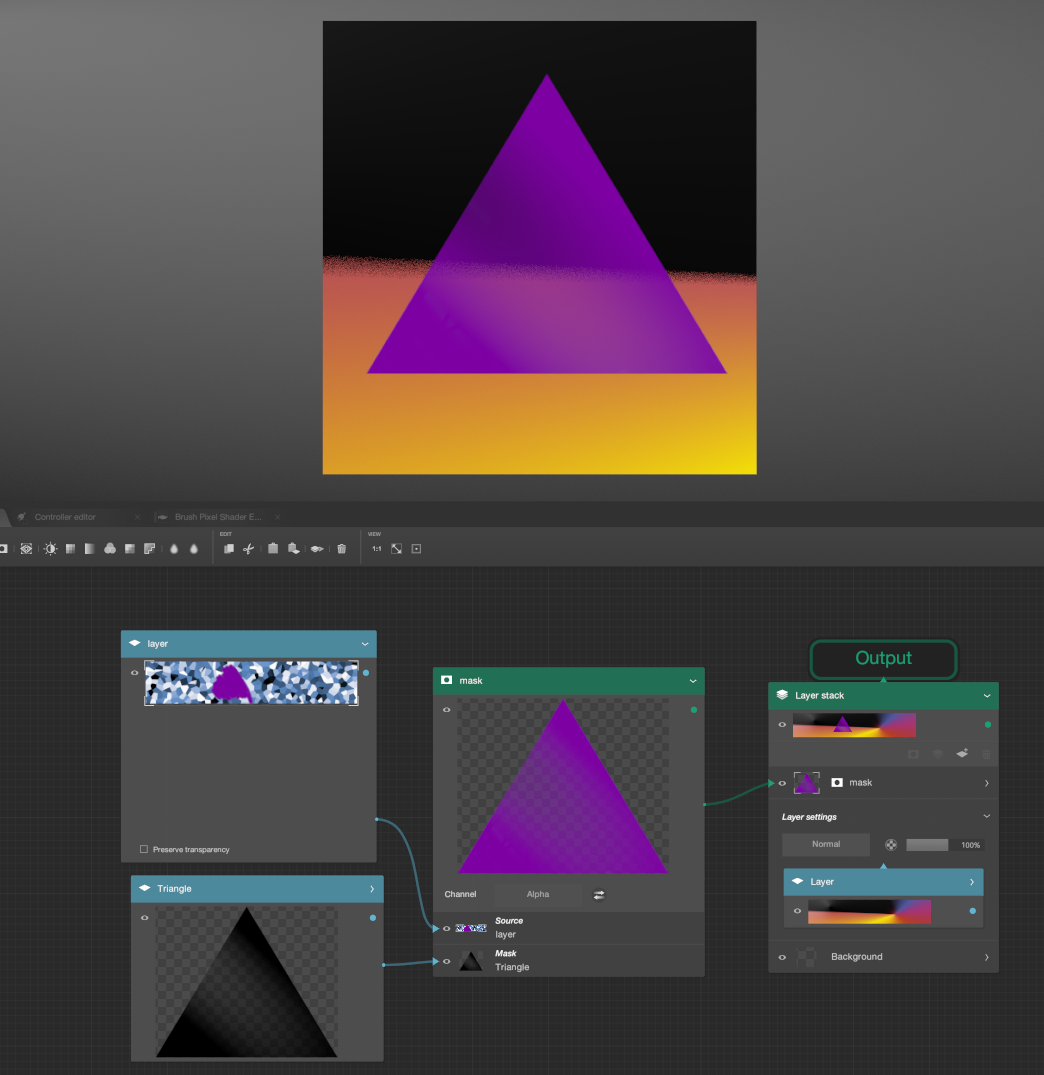
In this example the top Layer has only the purple area showing through over the top of the black and orange background. However you will notice that in the masking layer, I made a triangle with some of the triangle transparent in what is considered the masking area. This makes it so that whatever I paint into the layer above the masking layer becomes the triangle but with a bit of transparency. In some programs this is not allowed when you create an alpha channels but in many other programs this works this way. The alpha channel is based on the area defined not the contents within the area defined. Now let's talk about the luminance channel in the next article
This is Part 1 of 2. More to continue very soon.


Discussion (0)