Welcome to the second part of my series on masking. in this article we will be looking at the Luminance channels and the red, green, and blue channels.
Luminance Channels
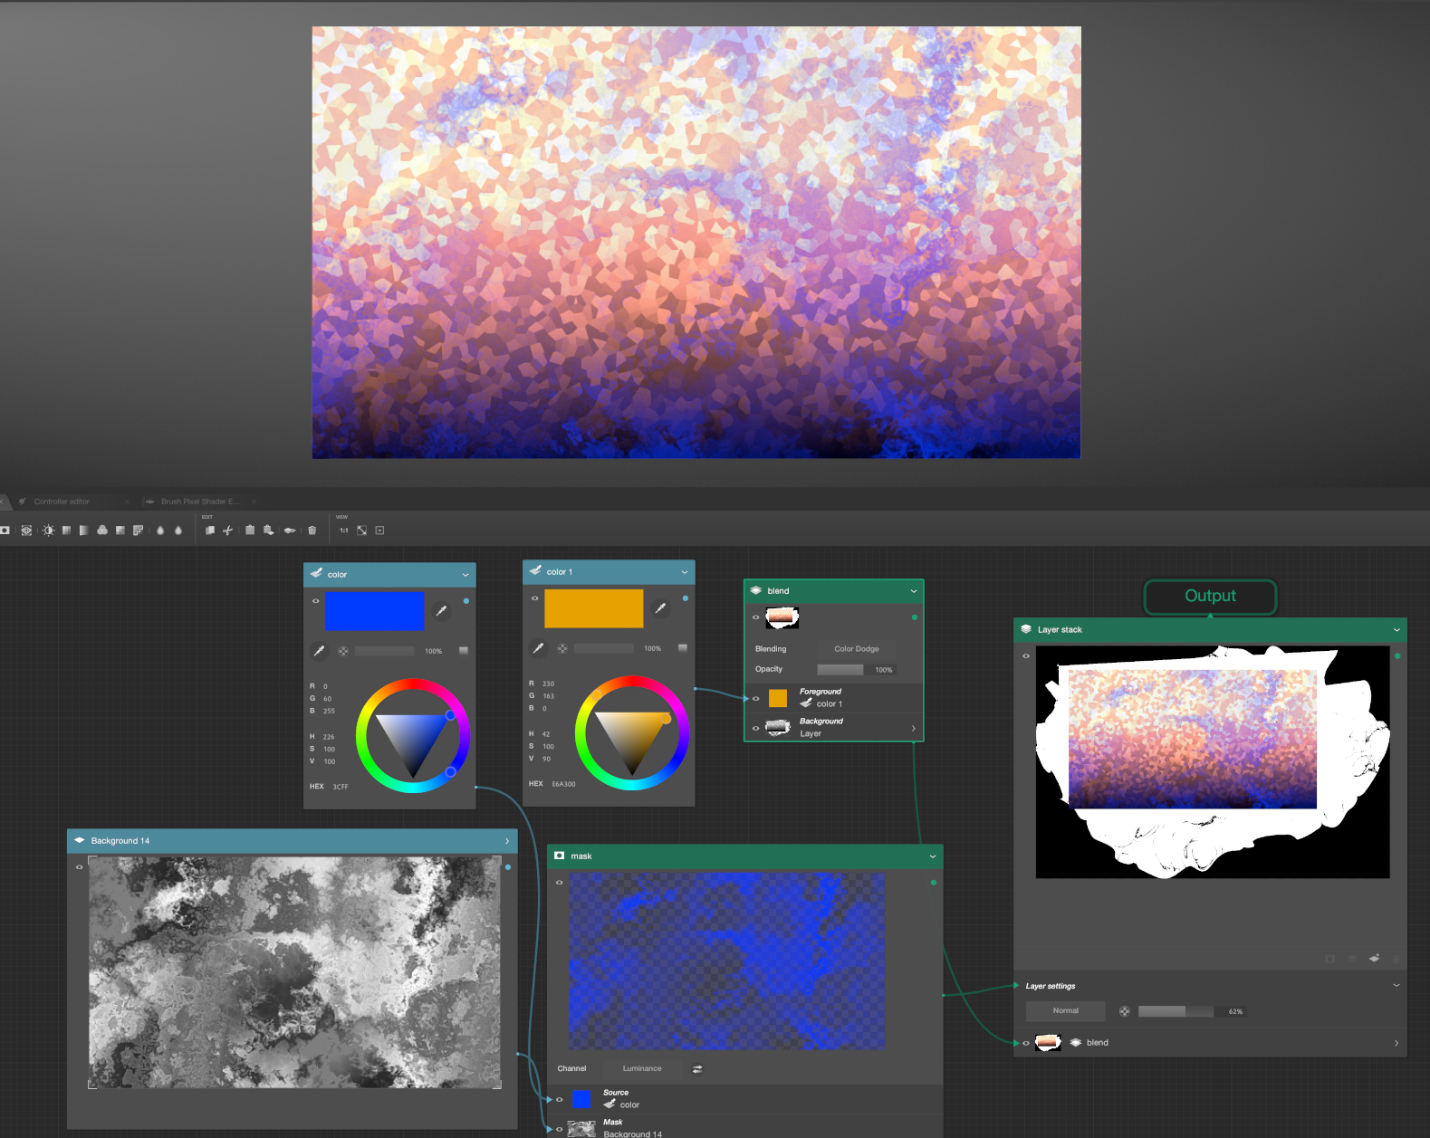
Here is an example how the luminance channel mode could be used. Below, the strawberry red colored layer (shown in top left) in the nodes is what will be affected by the mask (shown bottom left) that I am using with the mask node set to luminance. The luminance channel is different from the alpha because it uses a greyscale method to create the transparent of the masked areas. There are 256 (0-255) levels of transparency based on a greyscale. The color Black is invisible and the color white is visible as we already know however it's also about the variations of grey which are semitransparent based on the value of grey. This is varied by how close they are on a greyscale(or saturation) spectrum to white or black. So for example a 50%(128 saturation)grey color is also 50% transparent, and a 25% grey(64 saturation), is also 25% transparent.
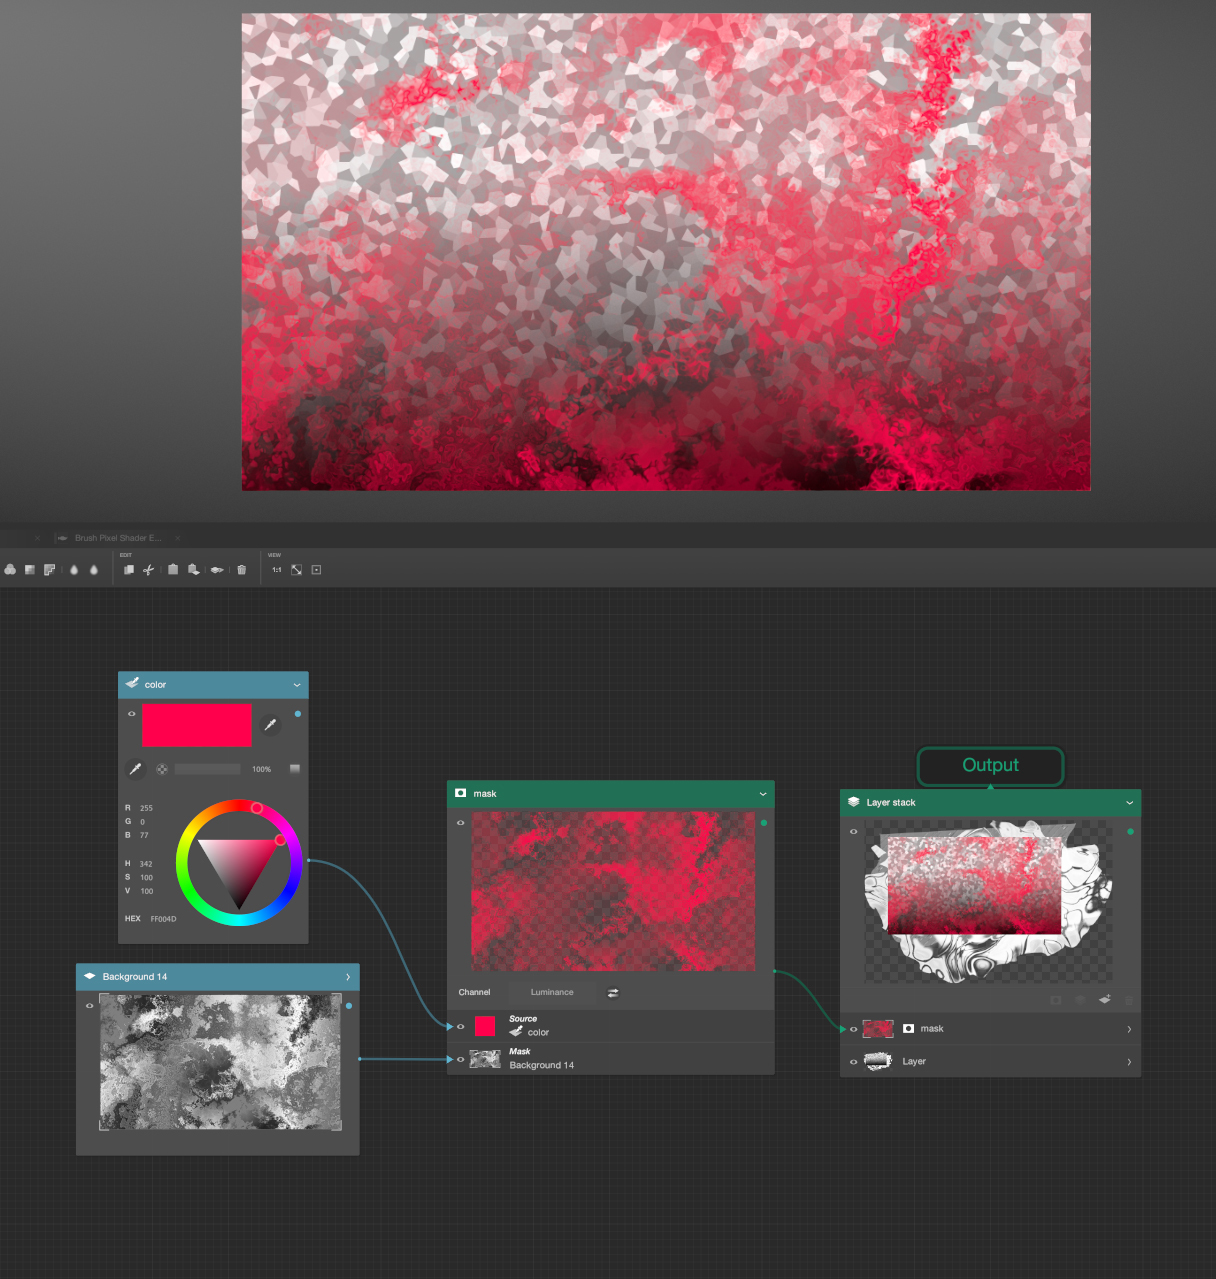
Notice that in the layered image on the bottom left there are tonal variations of black to white which cuts into the mask in various ways in the creamy strawberry red on the right. The Voronoi pattern you can see behind the mask layer, showing through the subtle gradations of red.
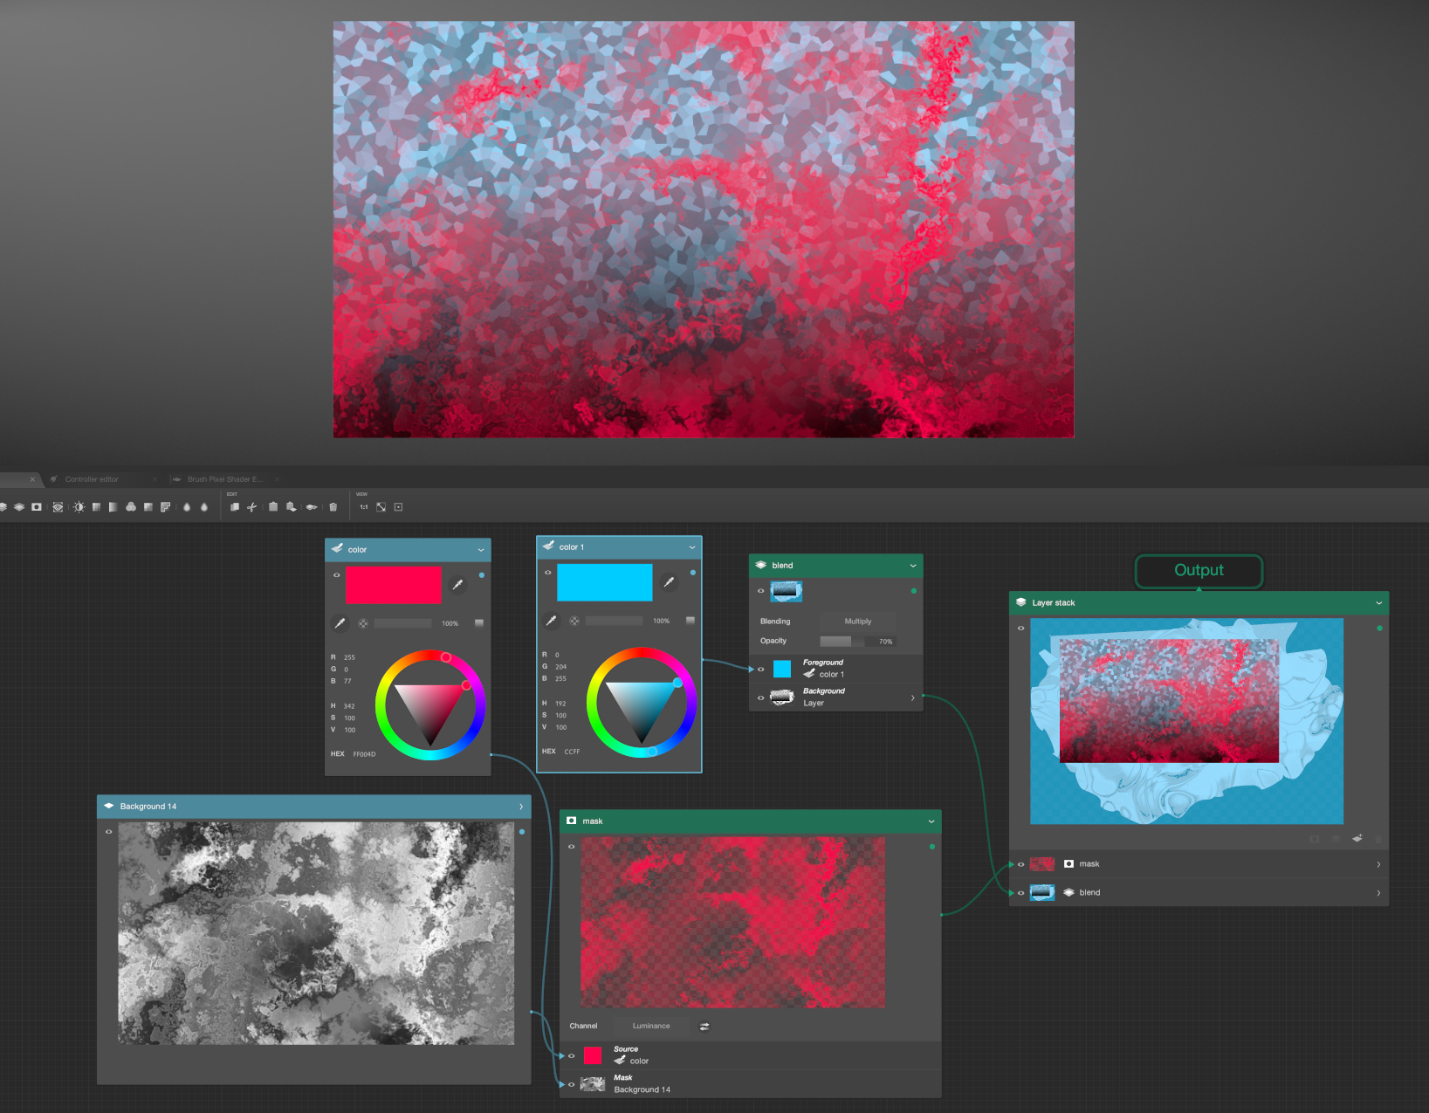
When I create a blend on the bottom layer, I can modify the bottom layer to have any color I choose. This is a basic example of the possibilities and does not even scratch the surface. The luminance masking technique in essence can separate the content from the design. (IE. the subjects color, pattern, or texture, ETC.) By making some small tweaks I can quickly mockup or change the look and feel of the painting created with these techniques. Below I have only changed my color layers to orange and blue and made some small tweaks to the blending layer from normal to color dodge and then in the final output layer stack. I changed the layer settings on the mask to be a little more opaque by changing the layer opacity to 62%. These are a few minor examples but take a moment to look at the image below and above and compare them.
Red, Green , Blue Channels
In the final mask channel example I will go through are the red, green and blue channels. This is a fun one. The Channels red, green and blue are meant for controlling color channels in a photo by adjusting the greyscale to the red, green and blue mask.
In Photoshop this was a good way to gain control of how your photo looked by adjusting the amount of black, to white of each color has to control amount of each color in a photo. A similar process to this is CMYK as well, when doing four color processing for desktop printing. At the moment lets discuss the blue channel because each of these channels work in the same way just with that color.
The luminance mask and the color mask are the same in that they work in a sort of scale. The difference between them is that the scale is based on that color. For example the image below shows a singular white layer that is being masked out on the blue channel that you can see the White and blue areas and the black or darker areas are completely to semi transparent.
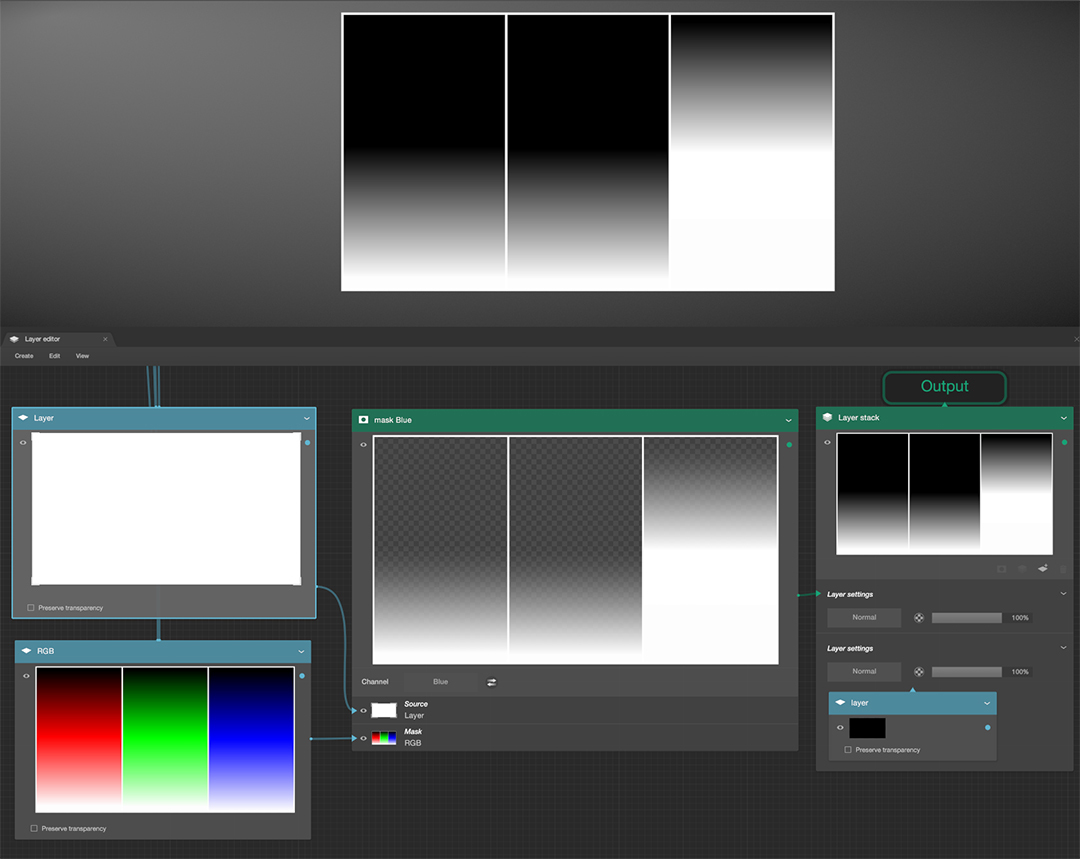
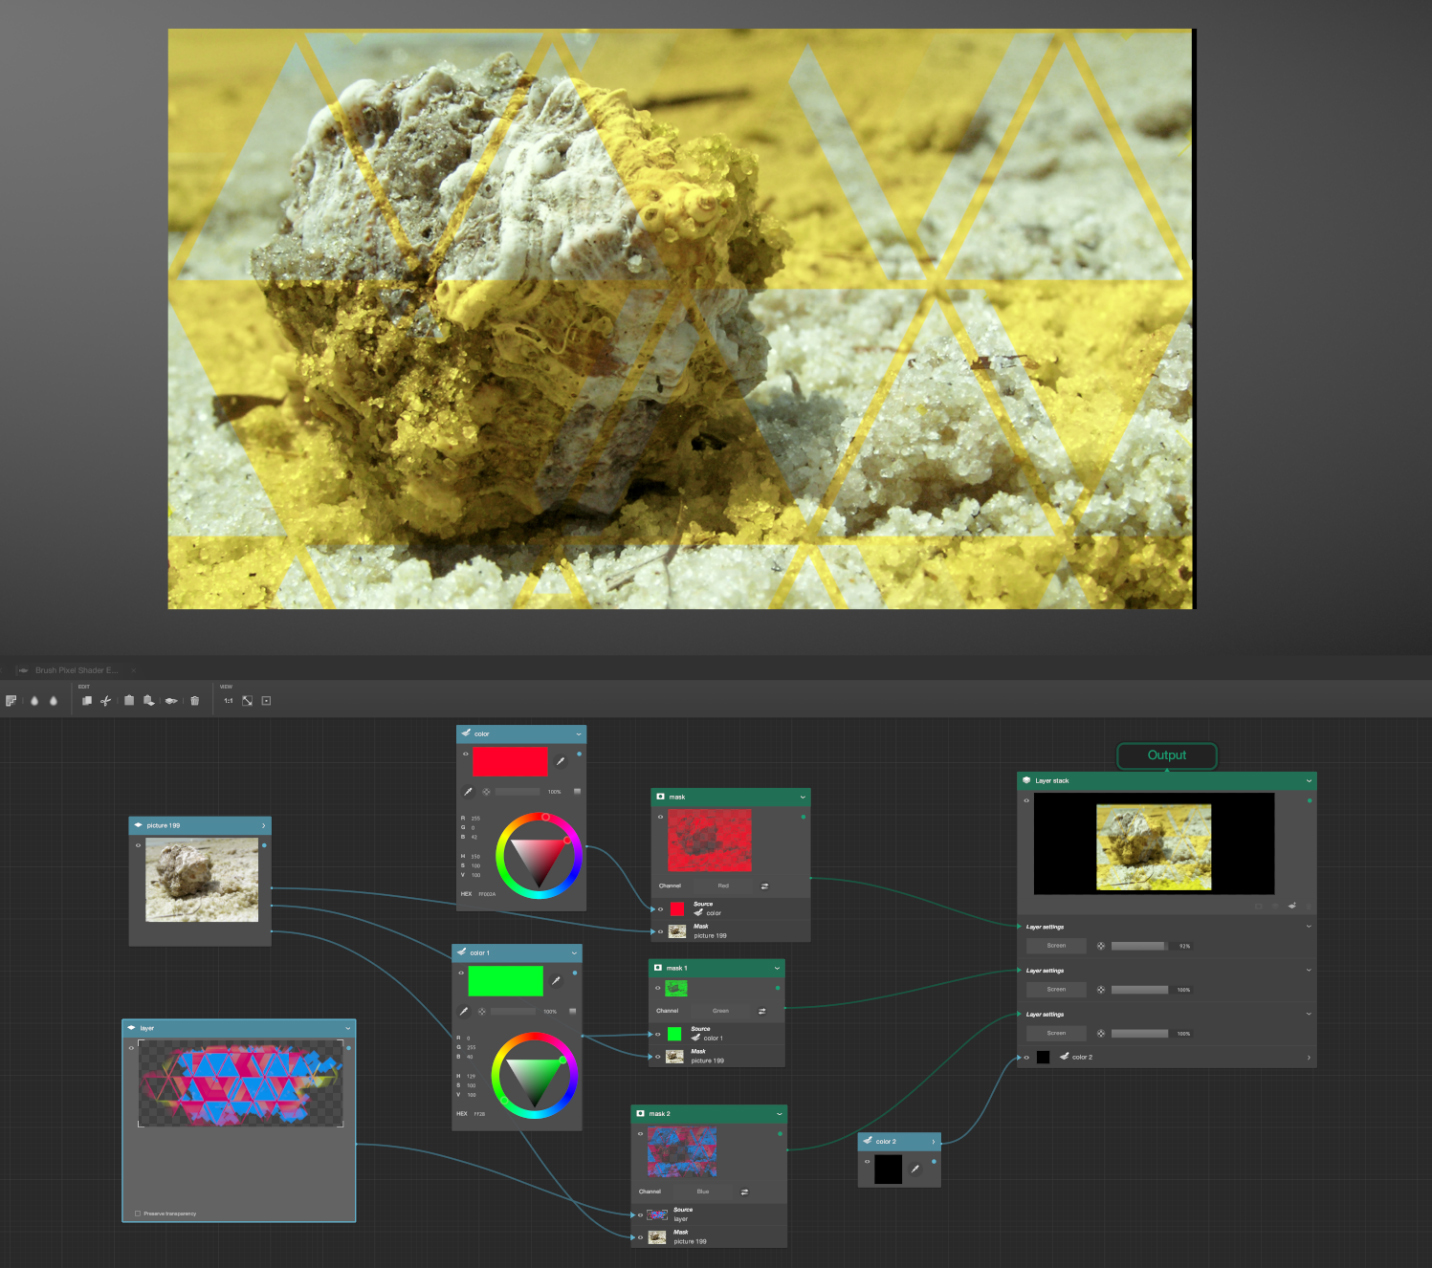
In this example I have an image that I created with equal amounts of red green and blue, all in black to the color(red, green, blue) to white gradients connected to their own masks with the channels set to red, green and blue in each of their own mask.
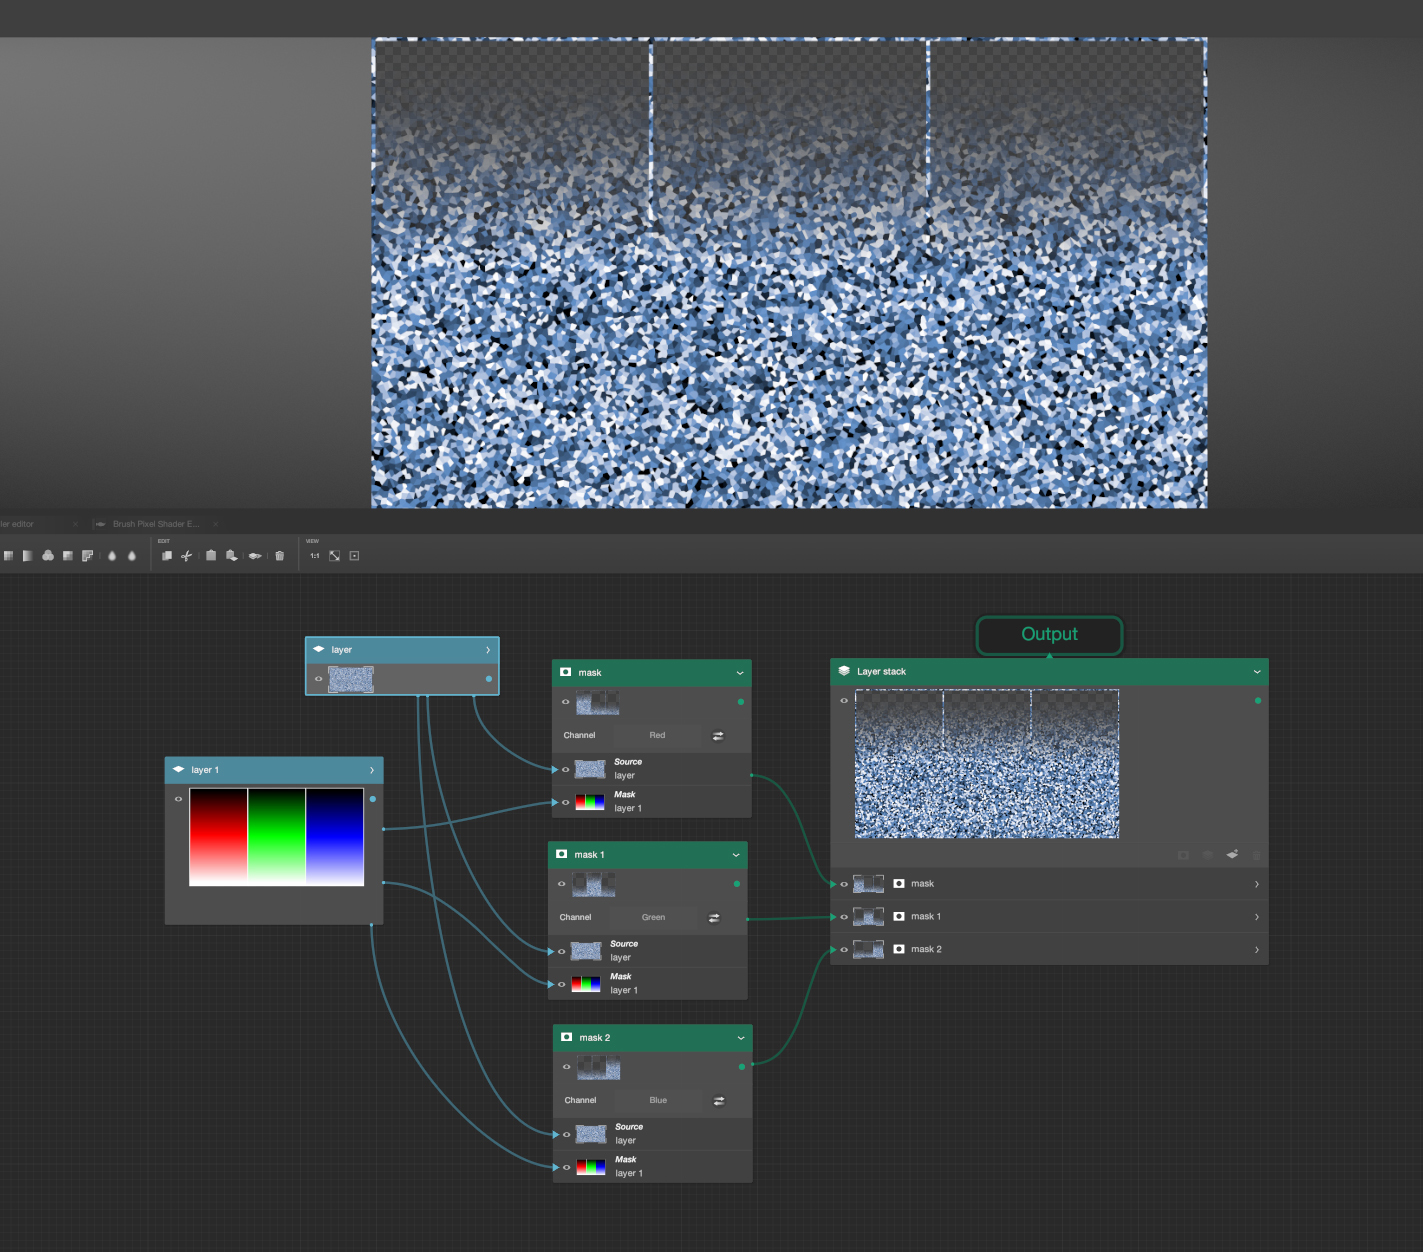
If I turn off the red and green mask by turning off the eyeball in the output layer I get just the reaction of the blue mask at the bottom like shown here.
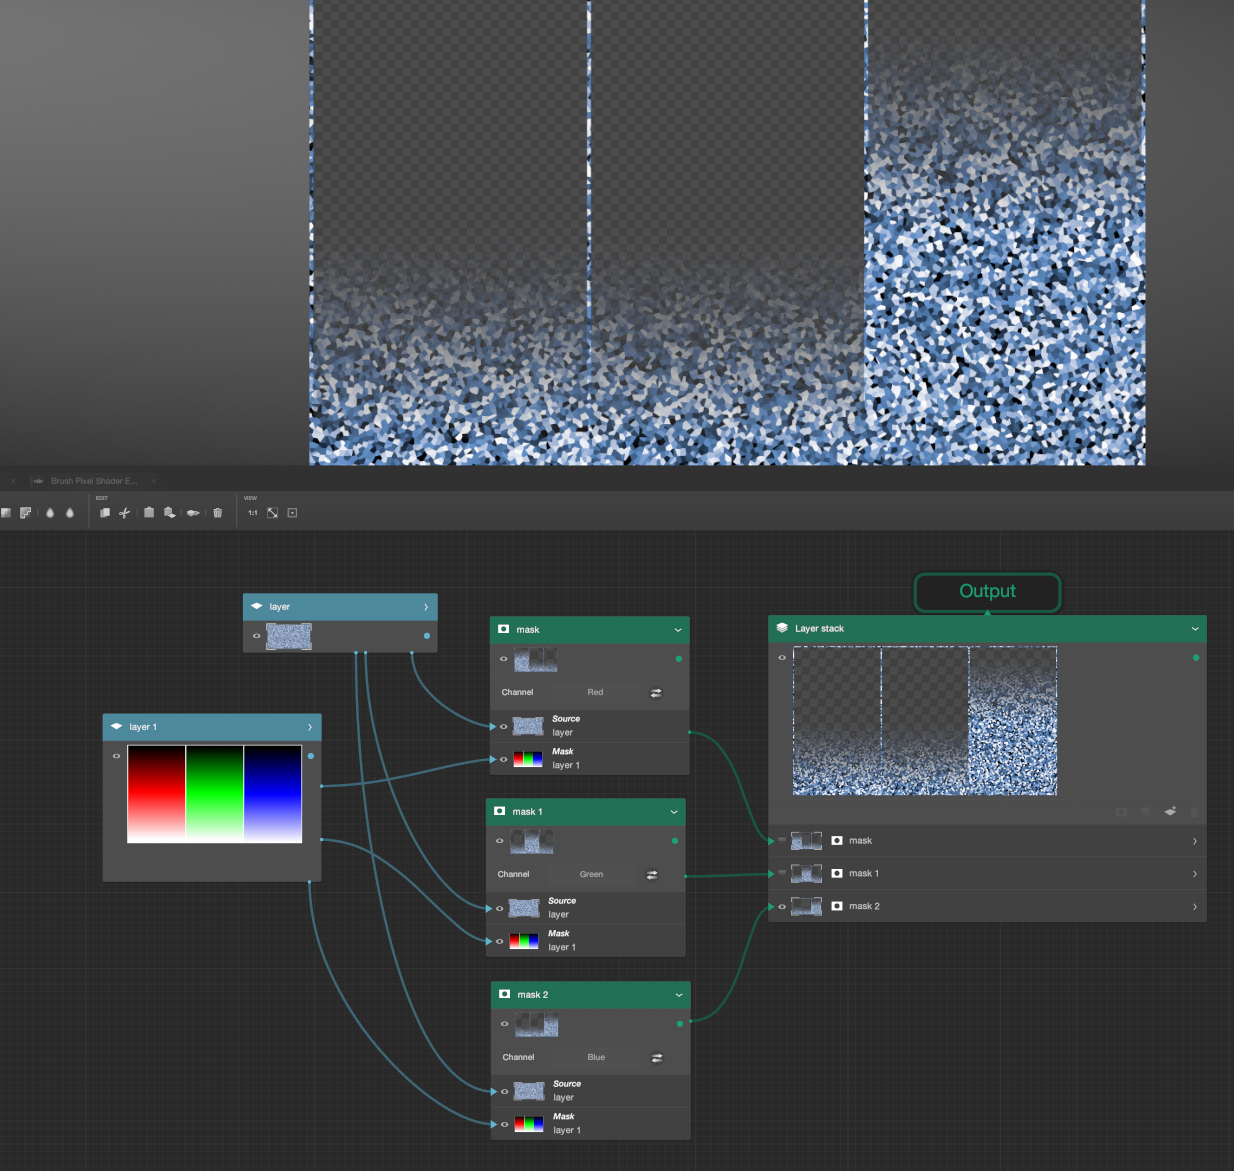
Notice that the blue cell pattern travels up higher than the Red and green scale because both are off. Only blue and white are seen in the image and all other colors are treated if they were a form of black or in this case transparent. Below is just the red mask turned on and the blue and green are off.

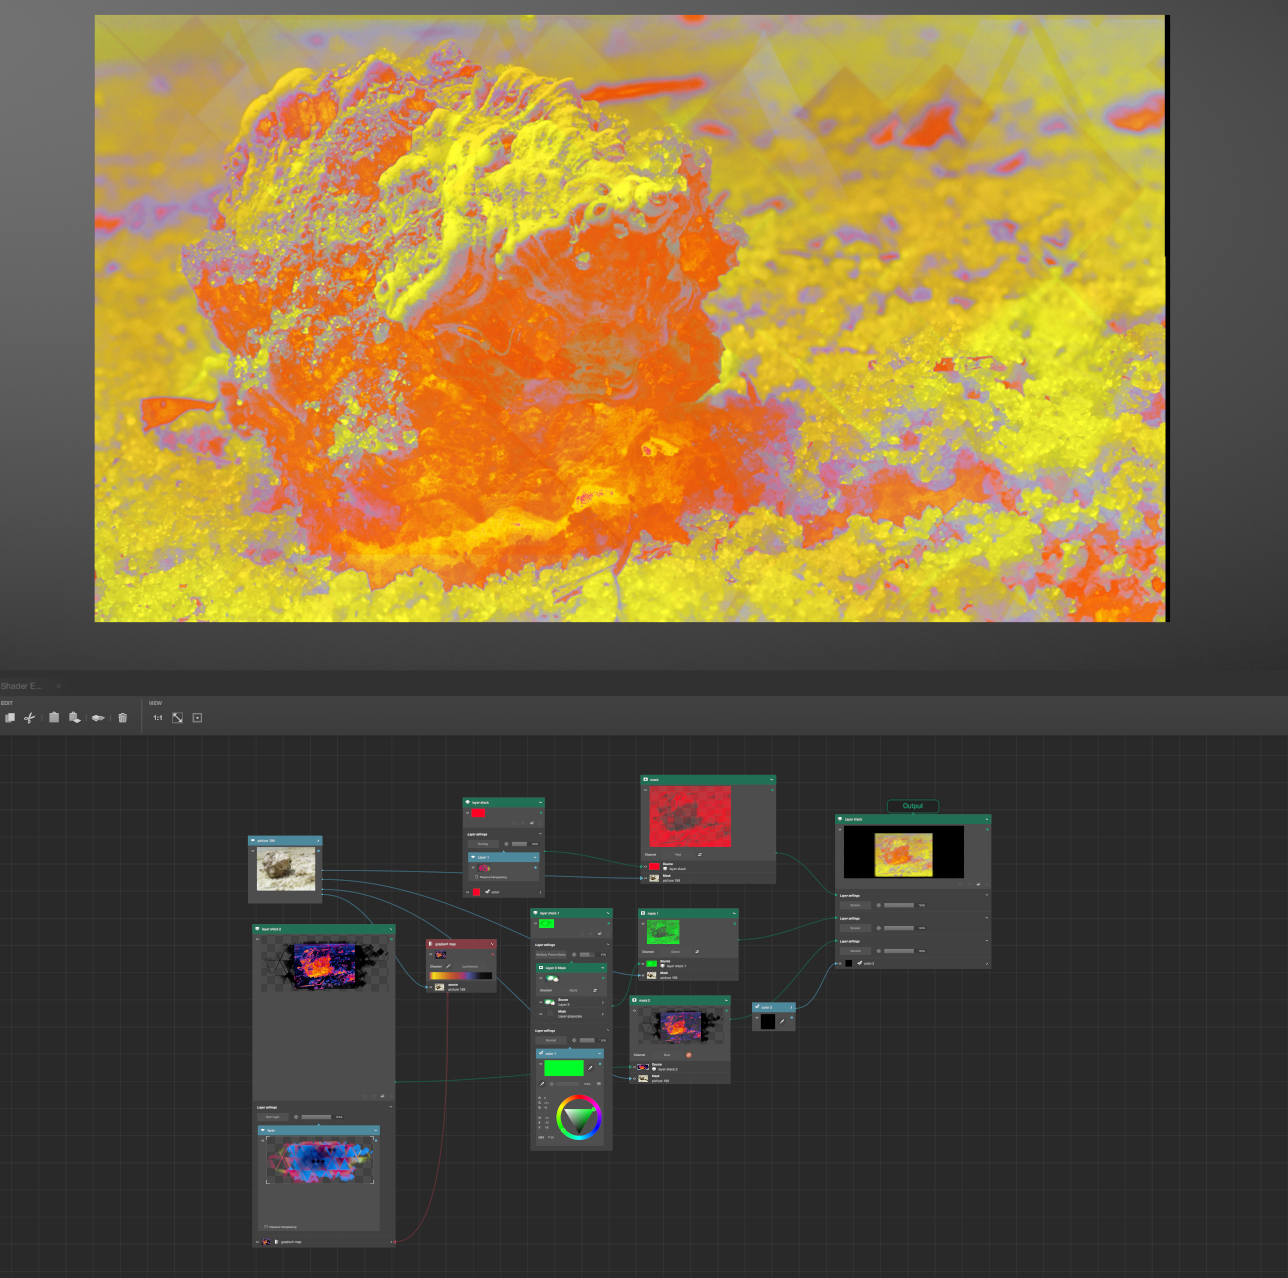
However, these channels can be repurposed in many different ways. This technique could be used to control what is seen and what is not in your art. In the example below I once used these isolation of colors to make it appear that something was in the front and other stuff was in the back by changing the order of where the red, green and blue were being used in a picture.

You could also use this to change color values in a picture of modify how your art reacts and blend to other pieces of your work. There are great possibilities for this function. In this example I have separated my photo into red green and blue, next I selected a green and red color to go with each of those masks and I then made blue layer and added yellow triangles to the layer. This creates yellow toned triangles in the blue spaces. Finally I set all of my layers to the blend mode screen on the final output and made the bottom layer black which creates the shown effect.
There is no end to the shenanigans you can create with this technique. Mixed with the other abilities inside the layer editor and together you can achieve some wild effects
An Example of Masking:
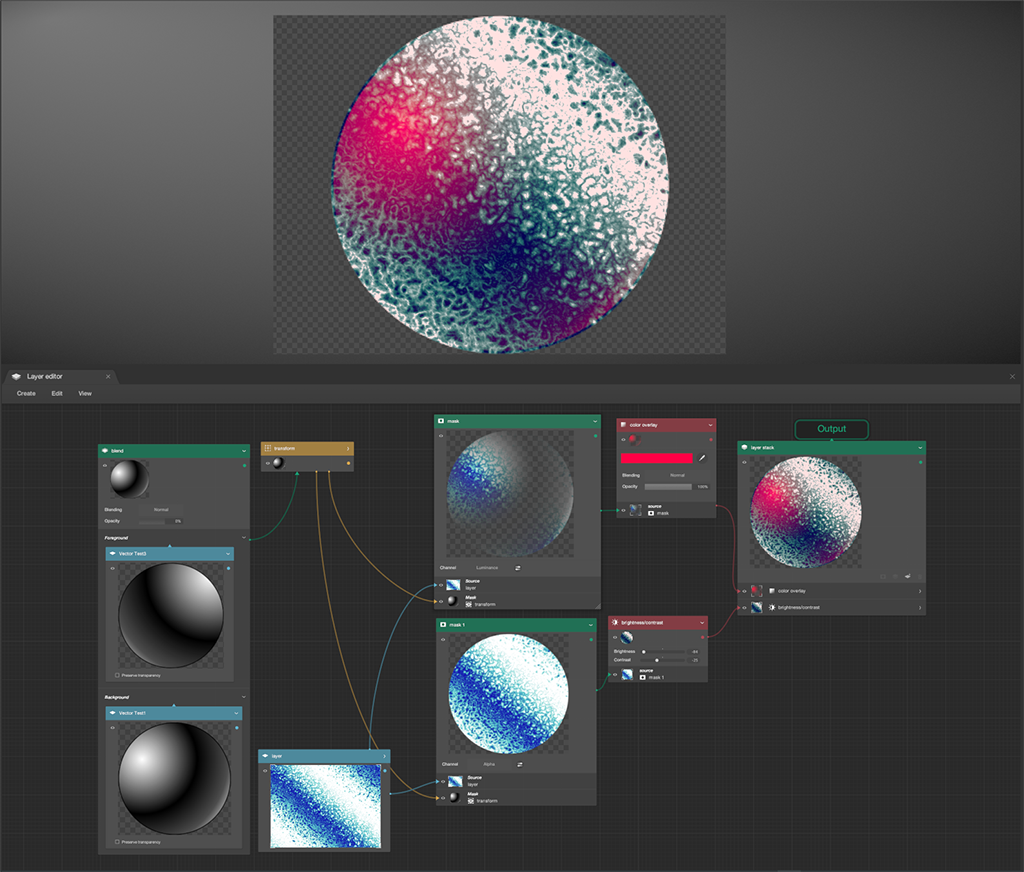
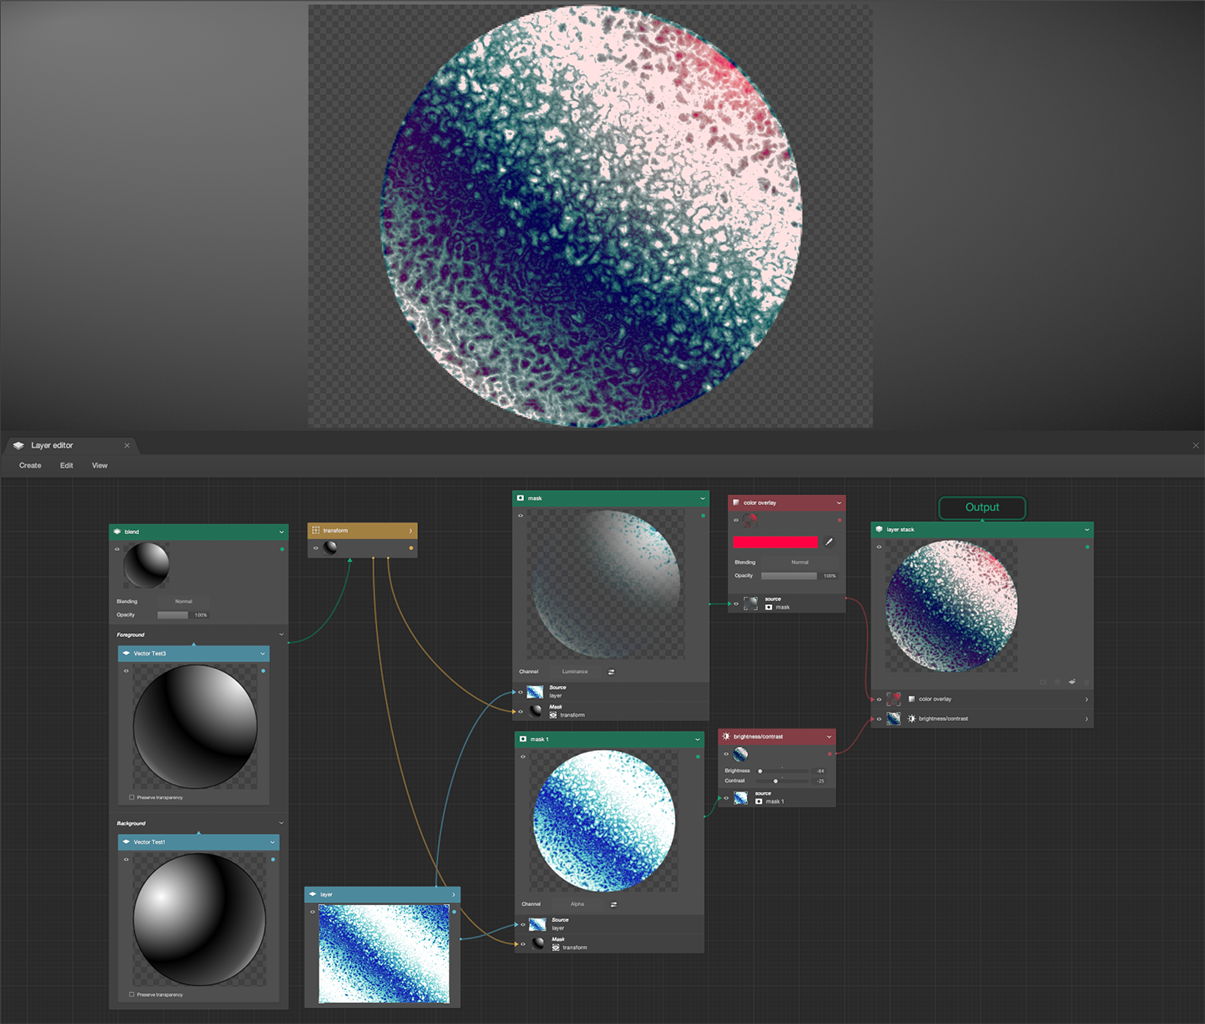
Here is an example of what masking could do. In this example, the first node is a control for the transitions for lighting from left to right. I am using a layer stack with two layers of the left and right lit sides of a sphere object I made. I use the opacity slider from the layer stack to change where the pink is coming from by moving the opacity to 100 % revealing the right sphere layer and to 0% to reveal the left sphere. Giving the fake appearance of light transitioning from left to right. The Second part I am creating two different masks. The first mask is an Luminance mask. The second mask is an alpha mask, so I can isolate what I paint and so that you only see what is painted inside the sphere. These two components together create a fake 3d feel. these two masks together give the appearance that I am painting a 3d object when in actuality I am just transitioning from one layer to another.
I hope this article/tutorial has taught you a little bit about how masks work and that you got something from this. If you got this far, thank you. I really appreciate you taking the time to read this in its length on a topic I find passion about. Please let me know if this was helpful and if I should do more of these longer form explanations in the comments. You can find me on almost all social media under my name and I look forward to sharing more like this in the future. -Jacob


Discussion (1)
@jacobmesick 10 golden nuggets for these posts 😄 my man. Best !